
Your wrist guard should be snug but not cutting off circulation. Finding the perfect fit is the complete guide to preventing injuries without losing mobility.
This article reveals expert tips and proven methods for achieving the ideal compression. Learn how to test your fit and avoid the most common sizing mistakes that lead to discomfort or failure.
Best Wrist Guards for Skating – Detailed Comparison
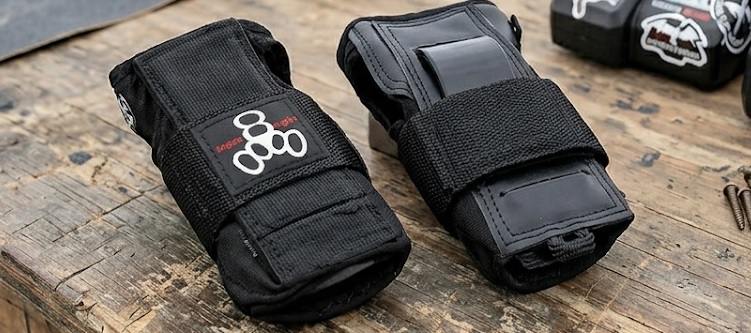
Triple Eight Wrist Guards – Best Overall Choice
The Triple Eight Wrist Guards feature a molded plastic splint and a breathable neoprene liner. They provide excellent impact protection for skateboarding and rollerblading. This is the best option for all-day comfort and reliable safety.
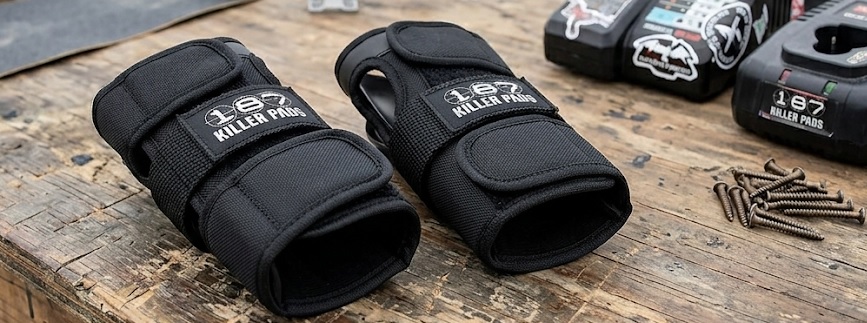
187 Killer Pads Wrist Guards – Best for High Impact
The 187 Killer Pads Wrist Guards use a dual-density plastic splint with a padded palm slider. They are ideal for aggressive skating and park riding. These are highly recommended for skaters who fall hard and often.
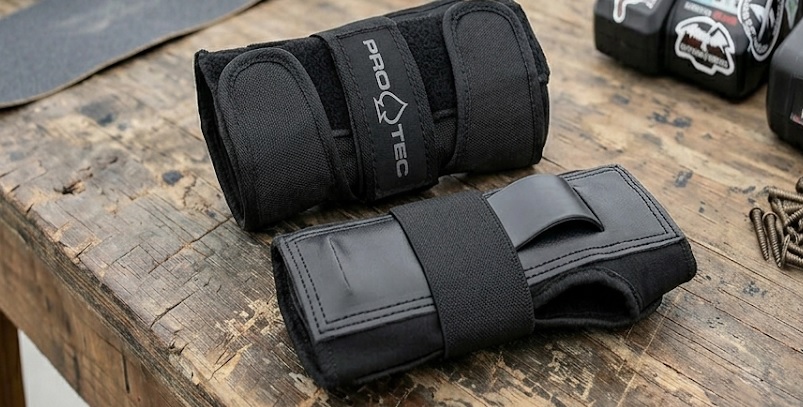
Pro-Tec Street Wrist Guard – Best Budget Option
The Pro-Tec Street Wrist Guard offers a simple, low-profile design with a single splint. It is lightweight and easy to take on and off. This is a recommended entry-level choice for casual skaters on a budget.
How to Achieve the Correct Wrist Guard Fit
Getting the right fit involves more than just pulling straps tight. You must check compression, mobility, and circulation. Follow these steps to avoid common mistakes.
Checking the Snugness Level
Your wrist guard should feel firmly secure without pinching your skin. You should be able to slide one finger between the strap and your wrist. If you cannot, the guard is too tight and will restrict blood flow.
Testing Mobility and Range of Motion
Bend your wrist forward and backward after fastening the guard. You should have full finger movement and a natural grip. If your fingers tingle or turn white, loosen the straps immediately.
- Too loose: The guard shifts during a fall, exposing your wrist to injury.
- Too tight: Numbness or tingling indicates cut-off circulation.
- Perfect fit: Snug with no slipping, full finger motion, and no discomfort.
Adjusting for Different Activities
Skateboarding requires a tighter fit to absorb high-impact falls. Weightlifting allows a looser fit to maintain full wrist flexibility. Always adjust your straps based on the specific sport you are performing.
Key Takeaway: A proper fit means the guard stays in place during movement but does not leave marks on your skin. Adjust gradually until you find the sweet spot.
Signs Your Wrist Guard Is Too Tight or Too Loose
Many skaters ignore the warning signs of a poor fit. Learning to read your body’s signals prevents injury and discomfort. Here is how to tell if your wrist guard needs adjustment.
Common Indicators of an Overly Tight Wrist Guard
Numbness or tingling in your fingers is the most obvious red flag. You may also notice red marks or indentations on your skin after removal. If your hand feels cold or your fingers swell, loosen the straps immediately.
- Loss of grip strength: You struggle to hold your skateboard or water bottle.
- Skin discoloration: Fingers turn pale or bluish due to restricted blood flow.
- Pain at pressure points: Discomfort around the splint edges or buckle area.
Warning Signs of a Loose Wrist Guard
A guard that slides around during movement offers zero protection in a fall. You should not be able to rotate the guard on your wrist. If it shifts more than half an inch, tighten the straps or downsize the product.
- Bouncing or rattling: The guard moves independently from your wrist during activity.
- Gaps between skin and pad: Air pockets reduce the guard’s ability to absorb shock.
- Frequent readjustment: You stop mid-session to retighten the straps repeatedly.
How to Perform a Quick Fit Check
Shake your hand vigorously for five seconds. The guard should stay firmly in place without any movement. Then, make a tight fist and release it slowly to confirm full finger circulation.
Key Takeaway: If you experience any numbness, pain, or slipping, stop and adjust immediately. A proper fit should feel like a firm handshake—secure but not crushing.
Wrist Guard Sizing Guide for Different Activities
The ideal tightness for your wrist guard changes based on your sport. High-impact activities need a firmer fit than low-impact training. Use this guide to match your activity with the correct compression level.
Skateboarding and Rollerblading
These sports require a snug, almost rigid fit to prevent hyperextension during falls. The splint should press firmly against your palm and the back of your hand. A loose guard here can lead to serious fractures on impact.
- Strap tension: Pull until the guard feels locked in place with zero movement.
- Mobility trade-off: Expect reduced wrist flexibility in exchange for maximum protection.
Weightlifting and CrossFit
Wrist wraps for lifting need a different approach than skating guards. They should be tight enough to support heavy loads but loose enough for full grip. You must be able to curl your fingers completely without resistance.
- Strap tension: Snug during the lift but loosened between sets for circulation.
- Ideal for: Bench press, overhead press, and heavy squats where wrist stability is critical.
Snowboarding and Skiing
Winter sports require wrist guards worn under gloves for added warmth and protection. The fit must be slightly looser to accommodate thermal layers and glove liners. Test the fit with your gloves on to ensure proper compression.
| Activity | Recommended Tightness | Key Priority |
|---|---|---|
| Skateboarding | Very snug | Impact protection |
| Weightlifting | Moderate | Flexibility |
| Snowboarding | Slightly loose | Comfort under gloves |
Key Takeaway: Always prioritize the specific demands of your sport over a one-size-fits-all approach. Adjust your wrist guard tightness for each activity you perform.
How to Adjust Wrist Guard Straps for the Perfect Fit
Most wrist guards come with two or three adjustable straps. Knowing which strap to tighten first makes a huge difference. Follow this step-by-step process to dial in your fit.
Step 1: Secure the Main Splint Strap First
Start with the strap that crosses the back of your hand near the knuckles. This strap anchors the splint against your palm. Pull it tight enough that the splint does not shift when you shake your hand.
Step 2: Tighten the Wrist Cinch Strap
Next, fasten the strap that wraps around your wrist joint itself. This strap controls how much your wrist can bend backward. Make it snug but leave room for a finger to slide underneath.
- Too loose: Your wrist can hyperextend during a fall, defeating the guard’s purpose.
- Too tight: The strap digs into your wrist bone and causes pain after ten minutes.
- Perfect: You feel support without pressure on the bony protrusion of your wrist.
Step 3: Adjust the Finger Loop (If Present)
Some wrist guards include a loop that goes around your middle finger. This loop keeps the guard from sliding down during activity. It should be snug but not cutting into the base of your finger.
- First: Attach the finger loop and slide it to the base of your finger.
- Second: Fasten the main splint strap over the back of your hand.
- Third: Secure the wrist cinch strap last for final compression.
- Fourth: Test by bending your wrist and making a fist.
Step 4: Perform a Final Movement Test
Bend your wrist forward as if pushing a heavy door. Then, try to bend it backward as far as possible. The guard should stop backward movement completely while allowing forward flexibility.
Key Takeaway: Always tighten straps in the correct order: splint first, wrist second, finger loop last. This sequence ensures the guard stays aligned with your anatomy.
Common Mistakes When Fitting Wrist Guards
Even experienced skaters make errors when putting on their wrist guards. These mistakes reduce protection and increase injury risk. Avoid these five common pitfalls for a safer experience.
Mistake 1: Over-Tightening for Security
Many users crank straps as tight as possible, thinking tighter equals safer. This actually restricts blood flow and causes numbness within minutes. A guard that cuts circulation cannot protect you because you lose grip control.
- The fix: Tighten until the guard is secure, then back off slightly until comfortable.
- The test: You should feel pressure but no pain or tingling sensations.
Mistake 2: Wearing Guards Too Loosely for Comfort
Some skaters leave straps loose to avoid discomfort during long sessions. A loose guard slides out of position during a fall, exposing your wrist. This gives you a false sense of security without actual protection.
- The fix: If the guard feels uncomfortable when snug, you may need a different size or brand.
- The test: Shake your hand vigorously; the guard should not move at all.
Mistake 3: Ignoring the Finger Loop
Many users skip the finger loop because it feels annoying or restrictive. This loop prevents the guard from sliding down toward your palm during impact. Without it, the splint can shift and fail to protect your wrist bones.
Mistake 4: Using Worn-Out or Stretched Straps
Velcro straps lose their grip after months of regular use. A strap that peels open during activity offers zero protection. Replace your wrist guards when the straps no longer hold firmly.
| Mistake | Risk | Solution |
|---|---|---|
| Over-tightening | Numbness, lost grip | Loosen until comfortable |
| Too loose | Guard shifts on impact | Retighten or resize |
| Skipping finger loop | Guard slides down | Always attach the loop |
| Worn straps | Guard falls off | Replace guards annually |
Key Takeaway: Most fitting problems come from ignoring small details like the finger loop or strap condition. Check your gear before every session to ensure full protection.
How to Measure Your Wrist for the Correct Guard Size
Choosing the right size wrist guard starts with accurate measurements. A poorly sized guard cannot be fixed by adjusting straps alone. Follow this simple measuring process to find your perfect fit.
Measuring Your Hand Circumference
Use a flexible measuring tape to wrap around the widest part of your hand, just below the knuckles. Do not include your thumb in the measurement. Write down the number in inches or centimeters for reference.
- Small: 6-7 inches (15-18 cm) hand circumference
- Medium: 7-8 inches (18-20 cm) hand circumference
- Large: 8-9 inches (20-23 cm) hand circumference
- X-Large: 9-10 inches (23-25 cm) hand circumference
Measuring Your Wrist Circumference
Wrap the tape around your wrist joint, right where the bone protrudes. Keep the tape snug but not tight against your skin. This measurement helps confirm the size suggested by your hand measurement.
Comparing to Brand Size Charts
Every brand uses slightly different sizing standards for their guards. Always check the manufacturer’s specific size chart before purchasing. A medium from Triple Eight may fit differently than a medium from 187 Killer Pads.
| Brand | Small | Medium | Large |
|---|---|---|---|
| Triple Eight | 6-7 in | 7-8 in | 8-9 in |
| 187 Killer Pads | 5.5-6.5 in | 6.5-7.5 in | 7.5-8.5 in |
| Pro-Tec | 6-6.5 in | 6.5-7.5 in | 7.5-8.5 in |
When to Size Up or Down
If your measurement falls between two sizes, consider your activity. Size up for snowboarding to accommodate gloves underneath. Size down for skating where a snug, locked-in fit is critical for impact protection.
Key Takeaway: Always measure your hand circumference first, then verify with wrist measurement. Never guess your size based on glove or shoe sizes alone.
How to Break In New Wrist Guards for Optimal Fit
New wrist guards often feel stiff and uncomfortable right out of the box. Breaking them in properly ensures they mold to your hand shape. This process takes time but dramatically improves comfort and performance.
The Initial Wear Period
Wear your new wrist guards around the house for 30 minutes at a time before using them for sports. This allows the neoprene and foam to warm up and begin conforming to your wrist. Do not overtighten during this phase to avoid pressure points.
- Day 1-2: Wear for short periods while watching TV or reading.
- Day 3-4: Increase to one hour sessions with light movement.
- Day 5-7: Use during low-intensity practice before full activity.
Using Heat to Accelerate Breaking In
Gentle heat helps the materials soften and mold faster to your wrist shape. Use a hair dryer on low heat for 30 seconds over the guard while wearing it. Move your wrist through full range of motion as the material cools.
- Caution: Do not use high heat or leave the dryer in one spot too long.
- Alternative: Place guards in a warm room or near a heater for 15 minutes before wearing.
Common Break-In Issues and Solutions
Some users experience rubbing or chafing during the break-in period. Apply moleskin padding to areas where the guard rubs against your skin. If discomfort persists after two weeks, the guard may be the wrong size.
| Issue | Cause | Solution |
|---|---|---|
| Stiff splint | New plastic needs flexing | Bend gently by hand 20 times |
| Chafing at edges | Rough seam contact | Apply moleskin or tape |
| Uncomfortable pressure | Strap too tight too soon | Loosen and gradually tighten |
| Foam feels hard | Material needs warming | Use body heat or low dryer heat |
Key Takeaway: Patience is essential during the break-in period. Do not force a tight fit on day one; let the materials adapt naturally to your wrist shape over time.
Conclusion: Mastering How Tight Wrist Guards Should Be
Getting the perfect fit means balancing security with circulation. Your wrist guard should be snug enough to stay in place but loose enough for full finger movement. This balance prevents injuries without sacrificing comfort.
Always test your fit before every session. Shake your hand, make a fist, and check for numbness. Adjust straps in the correct order for consistent protection.
Apply these proven methods to your next session. Your wrists will thank you with fewer injuries and better performance. Stay safe and ride with confidence.
Frequently Asked Questions about How Tight Wrist Guards Should Be
How tight should wrist guards be for skateboarding?
For skateboarding, wrist guards should be very snug with no movement when you shake your hand. The splint must press firmly against your palm and the back of your hand to prevent hyperextension during falls.
You should still be able to slide one finger under the wrist strap. If your fingers tingle or turn white, loosen the straps immediately. A proper fit balances impact protection with healthy circulation.
Can wrist guards be too tight?
Yes, wrist guards can absolutely be too tight. Over-tightening restricts blood flow, causing numbness, tingling, and cold fingers within minutes. This reduces your grip strength and increases the risk of dropping your skateboard.
Signs of excessive tightness include red marks that do not fade quickly, skin indentations, and loss of finger sensation. If you experience any of these symptoms, loosen the straps until comfort returns.
Should wrist guards be tight or loose?
Wrist guards should be tight enough to stay in place during activity but never so tight that they cut off circulation. The ideal fit feels like a firm handshake—secure but not crushing. You should have full finger movement at all times.
A loose guard slides out of position during a fall, offering zero protection. A tight guard causes numbness and discomfort. The sweet spot is snug with no slipping and no pain.
How do I know if my wrist guards fit correctly?
A correctly fitting wrist guard stays firmly in place when you shake your hand vigorously. You should be able to bend your wrist forward freely but feel resistance when bending it backward. Your fingers should move naturally without tingling.
The guard should not leave deep red marks after removal. If it shifts more than half an inch during movement, tighten the straps or consider a smaller size. Always test the fit before each session.
How tight should weightlifting wrist wraps be?
Weightlifting wrist wraps should be tight enough to support heavy loads but loose enough for full grip flexibility. Unlike skating guards, lifting wraps prioritize mobility over impact protection. You must be able to curl your fingers completely.
Tighten the wraps during your set for maximum support, then loosen them between sets to restore circulation. If your fingers tingle during a lift, the wrap is too tight. Adjust based on the specific exercise you are performing.
Why do my fingers go numb when wearing wrist guards?
Numbness in your fingers usually means your wrist guards are too tight. The straps are compressing the nerves and blood vessels that run through your wrist. This restricts circulation and causes tingling or loss of sensation.
Loosen the wrist strap immediately and shake your hand to restore blood flow. If numbness persists after loosening, your guards may be the wrong size. Consider trying a larger size or a different brand with a different fit profile.
How often should I replace my wrist guards?
You should replace your wrist guards every 12 months with regular use, or sooner if you notice wear. Check the Velcro straps for grip strength—if they peel open easily, the guards are no longer safe. Inspect the splint for cracks or stress marks.
Worn-out foam compresses and loses its shock-absorbing ability over time. If your guards feel less supportive than when new, replace them immediately. Your safety depends on fully functional gear.
Can I wear wrist guards under gloves for snowboarding?
Yes, you can wear wrist guards under gloves for snowboarding, but you must size up. Choose a guard that is one size larger than your normal fit to accommodate the extra bulk of glove liners. Test the fit with your gloves on before hitting the slopes.
The guard should feel snug but not tight when worn with gloves. If the guard restricts finger movement or causes numbness in the cold, it is too tight. Proper layering ensures warmth without sacrificing protection.