
Most children can start inline skating between ages 3 and 5, but readiness depends more on balance and coordination than age alone. Starting early builds gross motor skills and confidence in a low-impact, fun environment.
This complete guide reveals expert tips for determining if your child is ready, choosing the right gear, and teaching proven methods for safe first steps. Discover how to turn this milestone into a positive family activity by reading on.
Best Kids Skates for Beginners – Top 3 Picks
Rollerblade Microblade – Best Overall Choice
The Rollerblade Microblade features an adjustable shell that grows four sizes, making it the most cost-effective option. Its ABEC 5 bearings provide smooth gliding for new skaters. Ideal for children aged 4 to 8 learning basic forward motion and balance.
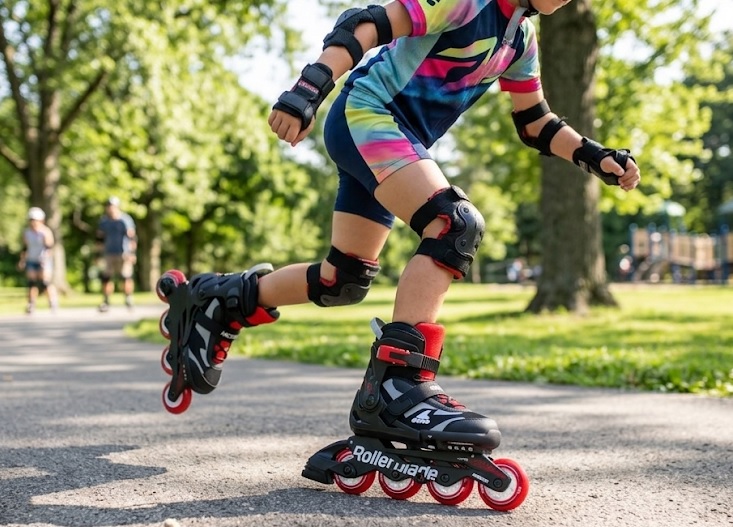
K2 Lil’ Shifter – Best for Stability
The K2 Lil’ Shifter uses a soft boot design with a lower cuff for better ankle support. Its brake system is intuitive and easy for small feet to activate. Best option for kids who need extra confidence and stability on pavement or rinks.
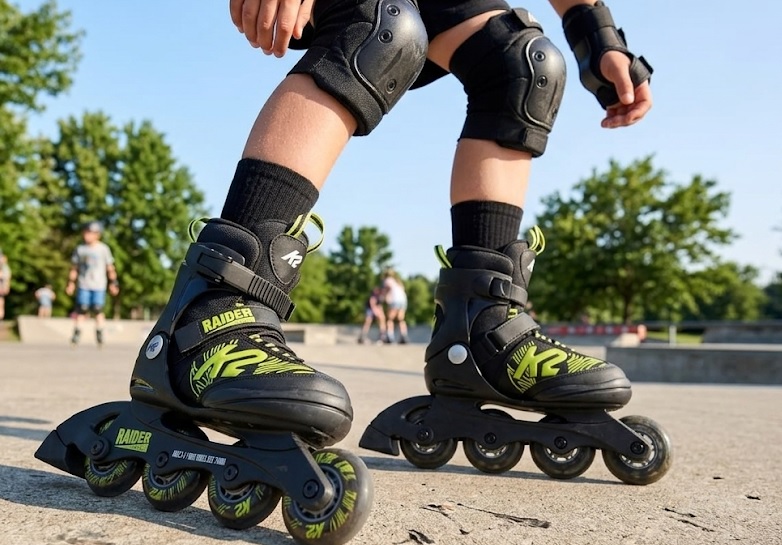
Razor Jr. Fuse – Best Budget Pick
The Razor Jr. Fuse offers a durable aluminum frame at an affordable price point. It includes a push-button brake and padded liner for comfort. Recommended for parents wanting a reliable, low-cost starter pair for occasional recreational skating.
How to Know If Your Child Is Ready for Inline Skating
Readiness for inline skating depends on physical development, not just calendar age. Look for stable walking and running without frequent tripping. Children who can balance on one foot for a few seconds are typically ready to try skates.
Physical Milestones to Check First
Your child should have adequate leg strength to stand and push off while wearing skates. They must also understand basic safety commands like “stop” and “slow down.”
- Balance: Can they stand on one foot for 3 seconds?
- Coordination: Do they ride a bike with training wheels?
- Attention span: Can they follow 2-step instructions?
Signs Your Child Might Need to Wait
If your child resists wearing a helmet or protective gear, postpone skating until they accept safety rules. Fear or frustration during physical play also indicates they need more time. Forcing the activity can create negative associations that last for years.
Age Guidelines by Skill Level
| Age Range | Typical Readiness | Best Approach |
|---|---|---|
| 2-3 years | Rarely ready | Push toys or balance bikes |
| 4-5 years | Often ready | Short sessions with full gear |
| 6+ years | Usually ready | Structured lessons or park play |
Every child develops at their own pace. Use these milestones as a guide, not a strict rule. When in doubt, let your child try skates indoors on carpet for a few minutes to gauge their comfort level.
Essential Safety Gear Every Young Skater Needs
Proper protective gear is non-negotiable for children learning to inline skate. A complete set dramatically reduces the risk of scrapes, fractures, and head injuries. Invest in quality equipment before your child’s first roll.
Helmet: The Most Critical Piece
Choose a CPSC-certified helmet designed specifically for multi-sport or skate use. Avoid bike helmets with extended visors that can catch during a fall. The helmet should sit level on the head with the strap forming a V under the ears.
Wrist Guards, Knee Pads, and Elbow Pads
Wrist guards prevent the most common skating injury: broken wrists from instinctive hand-out falls. Knee and elbow pads should have hard plastic caps with thick foam padding underneath.
- Wrist guards: Must have a rigid splint on both palm and top sides
- Knee pads: Look for double-stitched straps that won’t slip
- Elbow pads: Should cover the point and extend slightly above and below
How to Ensure a Proper Fit for Safety Gear
| Gear | Fit Check | Common Mistake |
|---|---|---|
| Helmet | Doesn’t move when shaking head | Wearing it tilted back |
| Wrist guards | Palm splint aligns with hand bones | Straps too loose |
| Knee pads | Center of cap sits on kneecap | Pads sliding down mid-session |
Replace any gear after a significant impact, even if no cracks are visible. Foam compresses on impact and loses its protective ability. Check straps and buckles regularly for wear and tear.
Step-by-Step Guide to Teaching Your Child to Skate
Teaching a child to inline skate requires patience and a structured approach. Start on a flat, smooth, and grassy surface to build confidence. Follow these progressive steps for the safest learning experience.
Step 1: Get Comfortable Standing and Balancing
Have your child stand on the grass with skates on but not moving. Practice the “pizza slice” stance: feet shoulder-width apart, knees bent, and arms forward. This position lowers the center of gravity and prevents falling backward.
- Practice falling: Teach them to fall forward onto knee pads, not backward
- Practice standing up: Roll onto all fours, then push up with hands
- Practice marching: Lift feet straight up and down without rolling
Step 2: Master the Basic Glide and Stride
Move to a flat, smooth pavement surface. Show your child how to push off with one foot while gliding on the other. Remind them to keep knees bent and look forward, not down at their feet.
Step 3: Learn the Stop (The Heel Brake)
The heel brake is the primary stopping method for beginners. Have them lift the toe of the braking foot while pressing down on the heel. Practice this at very slow speeds first until the motion feels natural.
| Step | Key Focus | Success Sign |
|---|---|---|
| Standing | Balance and bent knees | Can hold stance 10 seconds |
| Gliding | Alternating pushes | Rolls 5 feet without falling |
| Stopping | Heel brake pressure | Stops within 3 feet |
Keep initial sessions short, around 15 to 20 minutes. End on a positive note before fatigue or frustration sets in. Consistent, brief practices build skills faster than long, exhausting sessions.
Common Mistakes Parents Make When Teaching Inline Skating
Avoiding common errors can make the learning process smoother and safer for your child. Many parents unknowingly create bad habits or increase injury risk. Recognizing these pitfalls early will save you both frustration.
Mistake 1: Skipping the Gear or Using Ill-Fitting Equipment
Allowing a child to skate without wrist guards is a recipe for emergency room visits. Hand-me-down skates that are too large prevent proper control and cause blisters. Always ensure every piece of gear fits snugly before each session.
Mistake 2: Choosing the Wrong Practice Surface
Avoid steep driveways, cracked sidewalks, and gravel-covered paths. These surfaces cause unpredictable wheel behavior and painful falls. The ideal first surface is a smooth, flat basketball court or an empty parking lot.
- Too rough: Asphalt with large pebbles stops wheels abruptly
- Too sloped: Even a slight incline makes stopping impossible for beginners
- Too crowded: Parks with bikes and scooters create collision risks
Mistake 3: Holding Your Child’s Hand While They Skate
This creates a dangerous dependency and teaches incorrect posture. When you let go, your child will lean back, causing a hard fall. Instead, let them fall forward onto their pads and learn to balance independently.
Mistake 4: Pushing Too Fast or Expecting Too Much
| What Parents Do | Why It Hurts Progress | Better Approach |
|---|---|---|
| Move to pavement too soon | Child loses confidence from speed | Master grass first |
| Teach crossovers on day one | Overwhelms working memory | Only focus on gliding |
| Compare to siblings or friends | Creates anxiety and pressure | Celebrate small wins |
Patience is the most important tool in your teaching kit. Let your child set the pace and celebrate every small victory, from standing for five seconds to rolling ten feet. Positive reinforcement builds a lifelong love for skating.
Fun Games and Drills to Keep Kids Engaged While Learning
Turning practice into play keeps young skaters motivated and eager to improve. Boring drills lead to whining and early burnout. Use these creative activities to build skills without your child realizing they are learning.
Game 1: Red Light, Green Light
This classic game teaches speed control and stopping. Call out “green light” for gliding and “red light” for a full stop using the heel brake. Anyone who moves on red light goes back to the start line. It naturally reinforces braking reflexes in a fun, competitive way.
Game 2: The Cone Weave Challenge
Set up plastic cups or cones in a straight line, spaced three feet apart. Challenge your child to weave through them without knocking any over. This drill improves edge control and turning ability while building spatial awareness.
- Beginner level: Walk through the cones slowly without rolling
- Intermediate level: Glide through at a steady, slow pace
- Advanced level: Weave forward, then backward through the course
Game 3: Follow the Leader
Skate ahead of your child and perform simple moves for them to copy. Start with wide turns, gentle glides, and exaggerated knee bends. This game builds observation skills and body awareness without direct instruction.
Game 4: The Limbo (Under the Stick)
| Skill Developed | How to Play | Safety Tip |
|---|---|---|
| Balance and low stance | Hold a broomstick at waist height | Use a foam pool noodle instead |
| Bent knees posture | Child glides under while leaning back | Ensure flat, clear surface |
| Core strength | Lower the stick after each pass | Spot your child from the side |
End every practice session with a positive reward, like a sticker or extra park time. Kids associate skating with fun when games are the focus, not drills. This emotional connection keeps them coming back for more practice.
Inline Skating Classes vs. Teaching Your Child at Home
Deciding between professional lessons and DIY teaching depends on your budget, patience, and skating ability. Both approaches have distinct advantages for young learners. Understanding these differences helps you choose the best path for your child.
Benefits of Professional Inline Skating Classes
Certified instructors use proven progressions that build skills safely and systematically. They spot and correct bad posture habits before they become ingrained. Group classes also provide social motivation as children learn alongside peers at similar skill levels.
- Structured curriculum: Each class builds on the previous lesson
- Safe environment: Indoor rinks have controlled, smooth surfaces
- Expert feedback: Immediate correction of form and technique
Advantages of Teaching Your Child at Home
Home teaching allows for flexible scheduling and one-on-one attention. You control the pace and can stop immediately if your child becomes frustrated. This approach also costs nothing beyond the initial gear investment.
Cost and Time Comparison
| Factor | Professional Classes | Home Teaching |
|---|---|---|
| Cost per session | $15 – $30 | Free |
| Time commitment | Fixed weekly schedule | Flexible, as needed |
| Skill progression speed | Faster with expert guidance | Slower, parent-dependent |
| Social interaction | High (group setting) | Low (one-on-one) |
Hybrid Approach: The Best of Both Worlds
Many parents start with a few professional lessons to establish proper fundamentals. They then continue practice at home using the techniques learned in class. This hybrid method combines expert instruction with the comfort of familiar surroundings, often yielding the fastest results for hesitant learners.
How to Maintain Your Child’s Inline Skates for Longevity
Proper skate maintenance ensures safety, smooth rolling, and a longer lifespan for your investment. Dirt and neglect cause bearings to seize and wheels to wear unevenly. A simple weekly routine keeps skates performing like new.
Cleaning the Bearings and Wheels
Remove the wheels and wipe down the bearings with a dry cloth after each use. Avoid using water, as moisture causes rust inside the bearings. For deeper cleaning, use bearing lubricant specifically designed for inline skates, not WD-40.
- Weekly: Wipe wheels and check for debris stuck in bearings
- Monthly: Remove wheels, clean bearings with solvent, then relubricate
- Seasonally: Inspect for flat spots or uneven wear on wheel surfaces
Checking and Rotating the Wheels
Wheels wear down faster on the inside edge due to the natural pushing motion. Rotate wheels every few weeks to ensure even wear and extend their life. Swap the left and right wheels, and also flip them so the inside edge becomes the outside.
Inspecting Frames, Brakes, and Buckles
| Component | What to Check | When to Replace |
|---|---|---|
| Frame | Cracks or bends in aluminum | Immediately if damaged |
| Brake pad | Worn down to less than ¼ inch | When thin or uneven |
| Buckles | Cracks or difficulty latching | If strap doesn’t hold tight |
Teach your child to alert you when skates feel loose or make strange noises. Early detection of problems prevents accidents and costly repairs. Storing skates in a cool, dry place also prevents frame corrosion and liner deterioration.
Conclusion: Start Your Child’s Inline Skating Journey Today
Knowing what age kids should start inline skating is just the first step. The right gear, patient teaching, and fun games make all the difference in building confidence and skill.
Start with short, positive sessions on safe surfaces and always prioritize protective equipment. Every child learns at their own pace, so celebrate small victories along the way.
Grab your child’s skates, gear up, and head outside. The memories you create together will last far longer than any wobble or fall.
Frequently Asked Questions about Kids Inline Skating
What is the best age for a child to start inline skating?
Most children are physically ready between ages 4 and 5. At this stage, they have enough leg strength and balance to stand and glide short distances.
However, readiness varies by individual development. Focus on your child’s coordination and attention span rather than a strict age number.
Can a 3-year-old learn to inline skate?
Some 3-year-olds can learn basic balance on skates, but most lack the leg strength and focus needed. Short sessions on grass with full gear are safe if your child shows interest.
Forcing a 3-year-old to skate often backfires. Wait until your child can walk steadily, run without tripping, and follow simple safety instructions reliably.
What size inline skates should I buy for my child?
Choose skates that fit snugly with no more than one finger width of space behind the heel. Adjustable skates that grow four sizes offer the best value for growing feet.
Never buy oversized skates for your child to “grow into.” Loose skates cause blisters, poor control, and dangerous falls that discourage learning.
How long does it take for a child to learn inline skating?
Most children learn basic gliding and stopping within 3 to 5 practice sessions of 20 minutes each. Mastery of turning and confident skating usually takes several weeks.
Progress depends on practice frequency, your child’s natural coordination, and their comfort with falling. Consistent short sessions work better than long, infrequent ones.
What safety gear is absolutely necessary for kids inline skating?
A CPSC-certified helmet, wrist guards, knee pads, and elbow pads are all essential. Wrist guards are the most critical because broken wrists are the most common skating injury.
Ensure every piece fits snugly and stays in place during movement. Replace any gear after a hard fall, as foam compresses and loses protective ability.
Should I hold my child’s hand while they learn to skate?
No, holding your child’s hand creates bad posture and a dangerous dependency. When you let go, your child will lean backward and fall hard onto their tailbone.
Instead, let them fall forward onto their knee pads and learn to stand up independently. This builds real balance skills and confidence from the start.
What is the best surface for a child’s first skating session?
Start on flat, short grass to eliminate rolling speed and build balance confidence. Once your child can stand and march on grass, move to a smooth, flat basketball court.
Avoid cracked sidewalks, gravel paths, and any surface with a slope. Even a gentle incline makes stopping impossible for beginners and leads to scary, fast falls.
How do I know if my child’s inline skates fit properly?
Your child’s heel should stay firmly against the back of the boot when standing. The toes should lightly brush the front but not feel cramped or curled.
Have your child wear thin socks during fitting. Thick socks mask poor fit and cause overheating. Check the fit every few months, as children’s feet grow quickly.
Can my child learn inline skating without professional lessons?
Yes, many children learn successfully from patient parents using online tutorials and games. Home teaching offers flexible scheduling and zero cost beyond gear.
However, professional lessons provide expert feedback and structured progression. A hybrid approach of a few lessons plus home practice often yields the fastest results.
What should I do if my child is scared to try inline skating?
Start with wearing full gear around the house to normalize the feeling. Practice standing and marching on carpet before attempting any rolling movement outdoors.
Use positive encouragement and avoid pressure. Let your child set the pace, and celebrate every small achievement, even just standing for five seconds in skates.
Comments are closed.